13 Chrysler 200 Fuse Box Diagram – Fuse box diagrams are essential tools for understanding and troubleshooting the electrical system in your house or car. These diagrams provide a visual representation that shows the functions and layout of fuses and circuit breakers to protect circuits. This guide provides information on fuse box diagrams and symbols and common troubleshooting tips.
Types of Fuse Box Diagrams
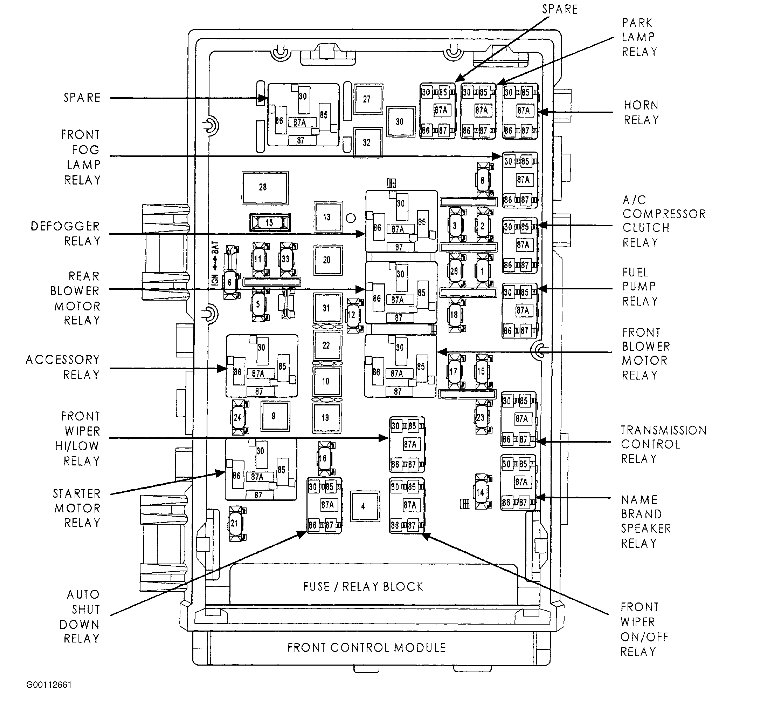
A diagram of the fuse box is an important tool for electrical and home repair projects.
Fuse box diagrams may be seen in a variety of locations, including residential buildings and automobiles. Two of the most commonly utilized types will be covered here:
A. A. The schematics are usually located in the owner’s manual or on the label within your fusebox.
C. Home Fuse Box Diagrams These diagrams are also known as house fuse boxes. They depict the arrangement of circuit breakers and fuses in the electrical system. These schematics can be found in the vicinity of or within an electrical panel door. They act as a record for homeowners regarding their home.
Understanding Fuse Box Diagram Symbols
The symbols of fuse boxes are visual representations that represent the different parts of an electrical system. These icons are commonly employed:
- Fuses small rectangles with an id inside, which represents the amperage of the fuse
- Circuit Breakers: A symbol resembling a switch that represents a safety device with a resettable
- ground: Looks similar to an inverted “T” with the horizontal line representing an electrical ground link
Common Fuse Box Problems
These steps can be used to determine and fix electrical issues:
- Step 1: Recognize the issue
Begin by identifying the problem to an electrical part in your vehicle. This could be your light or outlet, appliance or any light source within your home; or the radio in your car or air conditioning.
- Step 2 – Find the fuse that is appropriate
It is possible to identify the fuse or circuit breaker connected to the malfunctioning component by looking at the fuse diagram. This label will often include an explanation and/or symbol.
- Step 3: Check and Replace the Fuse:
Verify for damage or burnout by carefully removing the fuse. Replace the fuse using one of similar amperage , or reset your circuit breaker , if necessary. To ensure that the part is operating in a proper manner check it.
Conclusion
The most important thing to know when you are dealing with electrical problems at the home or in your vehicle is to understand fuse box diagrams. These steps will allow you to quickly and efficiently identify and fix common problems so your electrical system is functional and secure.
Gallery of 13 Chrysler 200 Fuse Box Diagram