Mini Cooper S Fuse Box Diagram – Diagrams for fuse boxes are crucial instruments to help you understand and fix the electrical system within your house or car. They illustrate the structure and function of circuit breakers as well as fuse boxes to safeguard circuits. This guide will help you with understanding fuse box diagrams, which include symbols and typical troubleshooting techniques.
Types Fuse Box Schemas
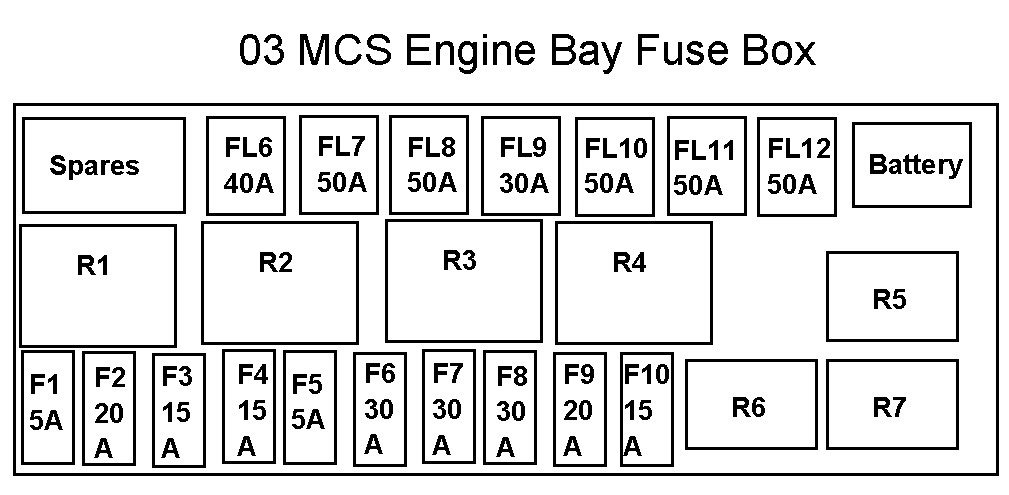
A diagram of the fuse box. It is an essential device for home repair as well as other electrical projects.

Diagrams of fuse boxes are accessible in many environments, including residential and automotive structures. Two of the most commonly used types will be discussed here:
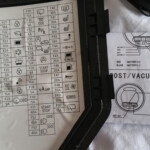
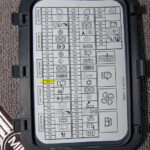
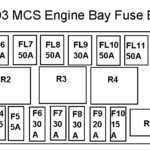
A. Automotive Fuse Box Diagrams These diagrams are specifically designed for automobiles and illustrate the circuits and the fuses that control elements like headlights as well as engine control modules and audio systems. The schematics are available in the owner’s guide of your vehicle or on a label in your fuse box.
C. C. The schematics are a source of documentation about their house.
Understanding Fuse Box Diagram Symbols
The symbols of fuse box diagrams are visual representations of the various components in the electrical system. The most common icons are:
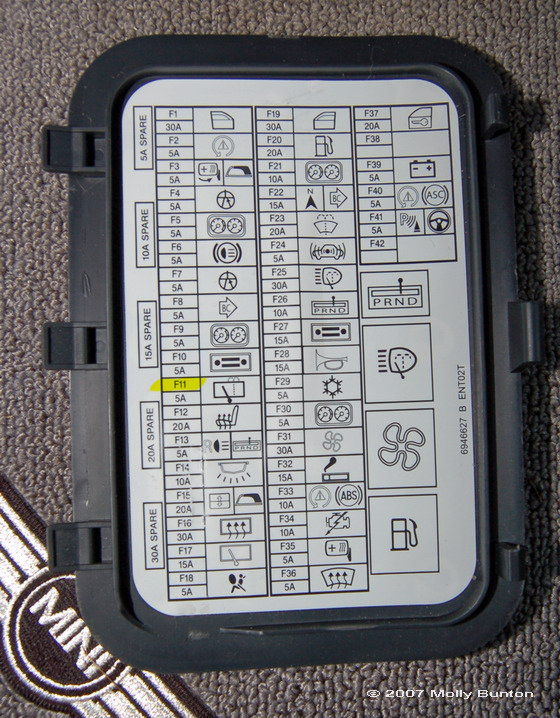
- Fuses. These are small rectangles with a number within. They indicate the fuse’s amperage rating.
- Safety Devices: A symbol resembling an actual switch, which represents the resettable safety mechanism
- Ground: Looks like an inverted “T” with a horizontal line representing an electrical ground connection
Common Fuse Box Issues
These steps are used to detect and resolve electrical problems:
- First, Recognize The Problem
First, identify the electrical component that isn’t working properly in your vehicle or home. This could be a lighting or outlet in your home; or an automobile function, such as radio or air conditioning in your vehicle.
- Step 2. Locate the Proper Fuse
Use the fuse box diagram to locate the fuse/circuit breaker that is associated with the malfunctioning component. It is usually marked with either an explanation or symbol.
- 3. Verify and then replace the fuse
Remove the fuse from the circuit breaker, and examine it for signs of damage. Replace it with one that is the same amp rating or reset the circuit breaker if necessary. It is important to verify the operation of the component.
Conclusion
The most important thing to know when you are dealing with electrical issues in your either at home or in cars is knowing the diagrams of fuse boxes. By following the steps laid out in this direction you will be able to quickly and effectively identify and repair common problems, ensuring your electrical systems are functional and safe.
Gallery of Mini Cooper S Fuse Box Diagram