Explorer Fuse Box Diagram – Schematics for fuse boxes are vital instruments for troubleshooting and understanding the electrical system in your home or automobile. They show circuit protection circuits and their function. This guide will help you to understand diagrams of fuse boxes, as well as symbols and typical troubleshooting techniques.
Types Fuse Box Diagrams
The fuse box diagram is a crucial tool for the home repair and electrical projects.
You can find fuse box diagrams in numerous settings, including automobiles as well as residential homes. Here are two typical types.
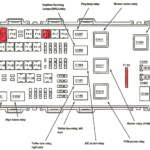
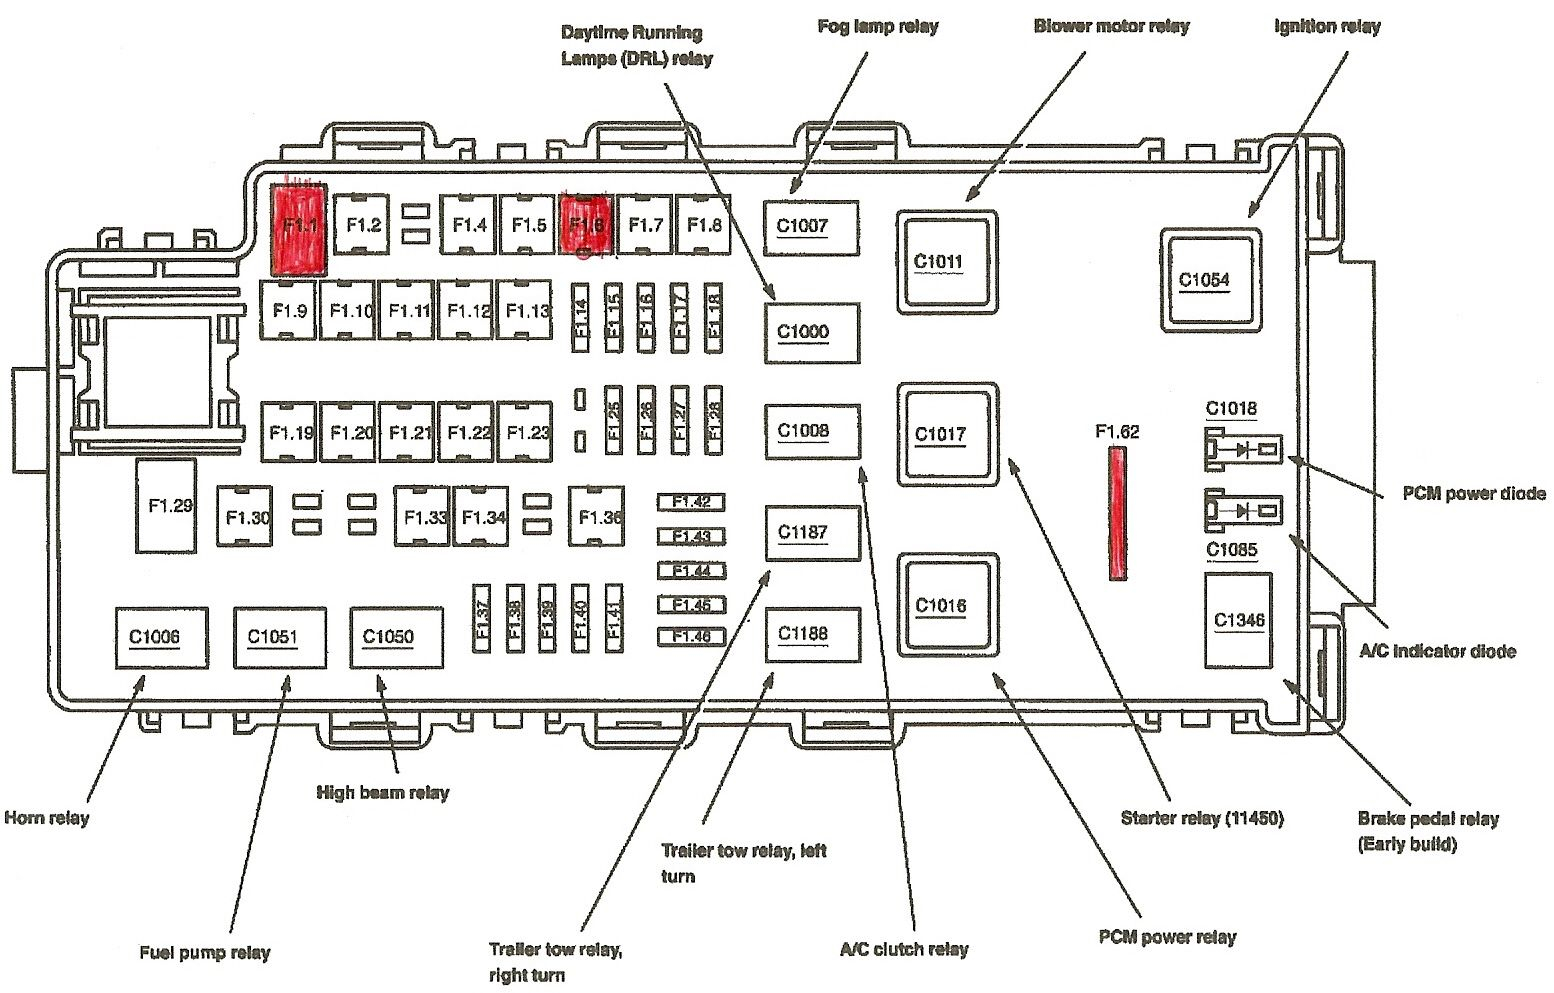
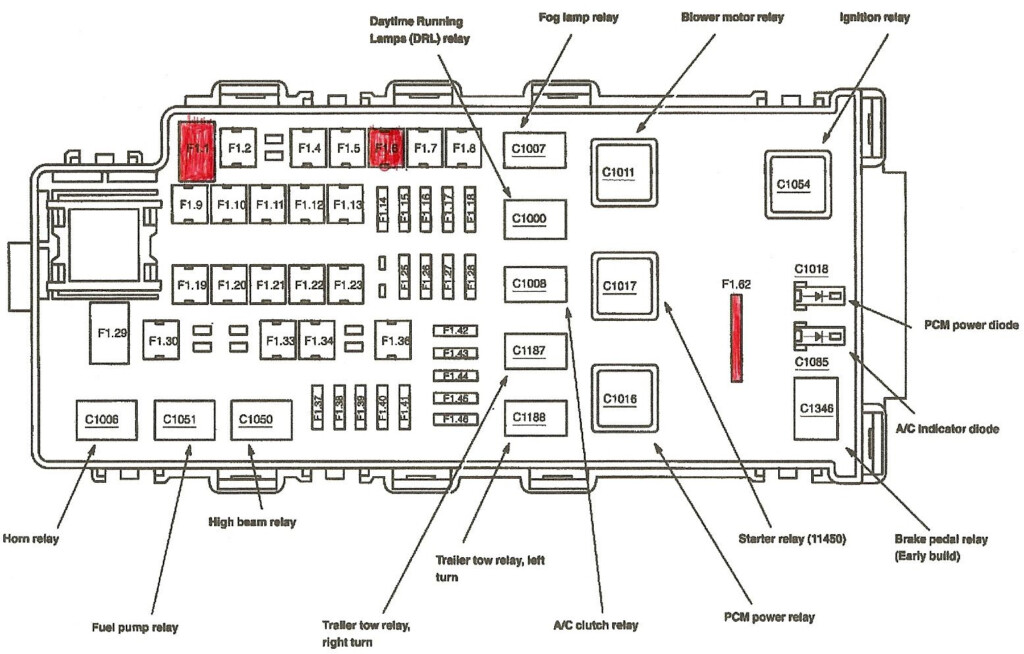
A. Automotive Fuse Box Diagrams. These diagrams are designed specifically for vehicles and show the circuits and fuses that control components like headlights engine control modules, and audio systems. These schematics can be found in the owner’s manual for your vehicle , or on a label inside the fuse box.
C. C. These schematics are usually located close to or within the panel’s doorway and serve as documentation to homeowners about their home.
Understanding Fuse Box Diagram Symbols
The symbols of the fuse box represent the various elements of an electrical circuit. These icons are common:
- Fuses are small rectangles with a number in them that represent the fuse’s amperage ratings.
- Circuit Breakers: A switch-like symbol representing a resettable safety device
- Ground: It appears to be an inverted “T” with a horizontal line representing an electrical ground connection
Troubleshooting Common Fuse Box Issues
If you’re dealing by electrical issues, these steps will help to identify and correct the issue:
- Step 1. Recognize the issue
Begin by identifying the problem to an electrical part inside your car. This could be a light or outlet at home, or an automobile function such as air conditioning or radios in your vehicle.
- Step 2 – Locate the fuse that is appropriate
Locate the circuit breaker or fuse associated with the component that is malfunctioning by using the diagram of the fuse box. The label may include the description or symbol.
- Step 3 – Confirm and Replace The Fuse
Take out the fuse and remove the circuit breakers. Examine the fuse for burning or damage. If needed, replace it the fuse with one that has a similar amperage or reset the circuit breaker. Examine this component to verify that it functions properly.
Conclusion
Understanding fuse box diagrams and symbols is essential for troubleshooting electrical issues in your car or home. This guide will show you how to swiftly and efficiently find and fix common electrical problems.
Gallery of Explorer Fuse Box Diagram